How to Add Custom Block Styles to an Existing WordPress Block
If you click on the Styles tab when using the Buttons block of the Gutenberg Editor, you will see that you can choose either the Fill or Outline style. What if we want to add more style options? Or what if we want to add custom style options for other blocks? Develop a separate block for the desired style? It doesn't really need to be that complicated. In this article, I'll show you how to add custom style options to an existing block, simplifying your process.
How to register a new block style
To register a new block style with PHP, we need to use the register_block_style function. This function requires the$block和$style_properties Parameters.$block The $block parameter specifies the block to which custom styles are to be added.$style_properties Specifies some properties of the custom style.
Below is an example of adding a new “Plain“ style to a List block:
function wprs_register_block_styles() {
register_block_style(
'core/list', [
[
'name' => 'list-plain',
]
);
}
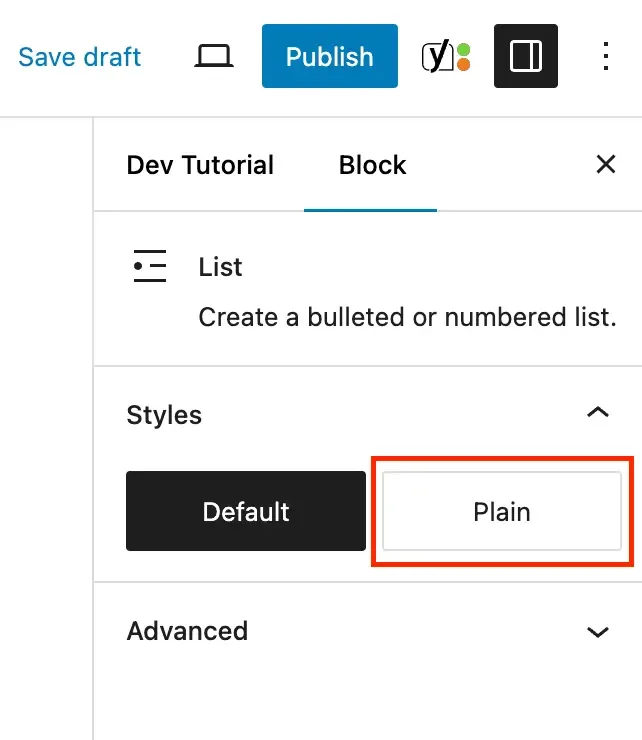
add_action( 'init', 'wprs_register_block_styles' );After adding the above code, we will see a "Plain" style after using the List block as shown below.
In the example above, I've used “core/list“ as the $block parameter, not just “list”.All of WordPress' default block names are prefixed in this way. If you're not sure of the correct name of a block, check out theList of all WordPress core blocks。
In addition, we have mentioned two attributes (required attributes) for custom styles:name (of a thing)和tab (of a window) (computing). The label will be used as text in the Gutenberg editor interface, and the name will be used for the class name added to the block in is-style-{name} format.
So far, we've learned how to register custom block styles that you can select in the Gutenberg editor. However, this won't actually make any difference in the way your block looks because we haven't added the additive CSS code for these styles yet; next, we need to add the required CSS code for the specified class name.
Adding CSS code to custom block styles
When we select a block style, WordPress will set the classnameis-style-{name}Inserted into the class attribute of the block, we can use it to position the element.
Let's say we want to add a checkbox list style type to our website, then we can register the style like this:
function wprs_register_checkmark_list_style() {
register_block_style(
'core/list', [
[
'name' => 'list-checkmark',

]
);
}
add_action( 'init', 'wprs_register_checkmark_list_style' );
You can then add the following CSS to your website to apply custom checkbox styles to the list:
@counter-style checkmark {
  system: cyclic;
  symbols: "\2713"; suffix: " ";; }
  suffix: " "; }
}

.wp-block-list.is-style-list-checkmark {
  list-style: checkmark; }
}
We only need to add CSS to the theme's style.css file, WP custom CSS, add the style can be displayed on the front end of the site normally.
Adding Custom Styles to the Block Editor
Taking it a step further, we need to add the custom add to the block editor so that when selecting a custom style, we can see our selection in real time in the block editor.
To register CSS along with the styles, we can do it in two ways:
- Customized Style Sheets: You can pass the “style_handle“ attribute to the register_block_style function, containing theRegistered Style SheetsThe name of the block. WordPress automatically loads the CSS file when the block is added to the post content.
- Inline CSS: You can enter the CSS you wish to apply to the custom block style in the “inline_style“ attribute.
The following sample code shows both methods:
function wprs_register_block_styles_with_css() {
// Style that loads stylesheet.
register_block_style(
'core/list', [
[
'name' => 'list-example-one',
'style_handle' => 'list-example-one-style-handle'
]
);
// Style that adds inline CSS.
register_block_style(
'core/list', [ ]; // Style that adds inline CSS.
register_block_style( 'core/list', [
'name' => 'list-example-two', 'label' => 'Example Two', [
'inline_style' => '.wp-block-list.is-style-list-example-two { list-style: square; }',
]
).
}
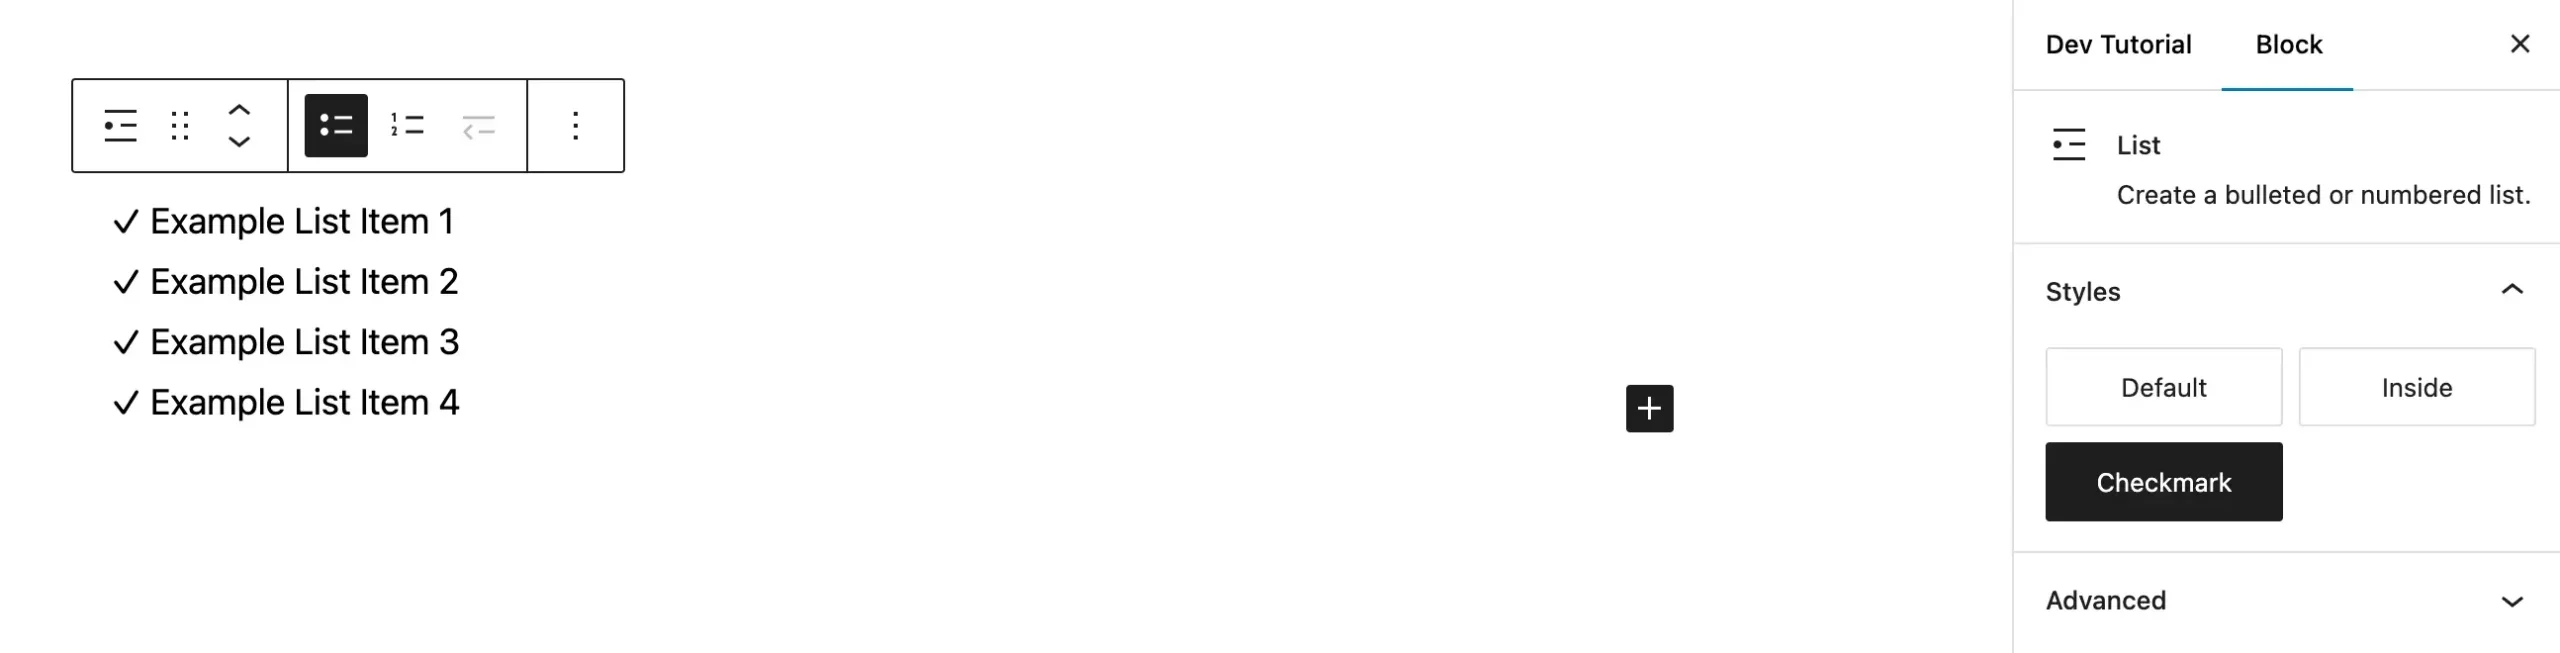
add_action( 'init', 'wprs_register_block_styles_with_css' );In if customizing CSS is easier, I recommend using the inline_style property. This will make your site faster because it doesn't need to load third-party dependencies. After adding the custom CSS, we then select the "Checkmark" style and we will get the list as shown below.
How to set a custom style as default
Although not recommended, we can set the custom style as the default if you wish, simply by setting theis_defaultattribute can be passed to the array as follows:
register_block_style(
'core/list',
[
'name' => 'list-new-default',
'label' => 'New Default', 'is_default' => true, // ADD THIS.
'is_default' => true, // ADD THIS.
]
);
Now, as soon as you insert the target block (List in this case), your custom style will be used as the default style.
critical: When custom styles are set as default styles, it means that no custom class name will be added to the block when it is selected, and we need to write the default styles directly into the CSS when developing the theme.
In this tutorial, we introduced how to add custom style options with an existing block, with this foundation, in the development of WordPress themes and plugins, we can according to our needs, for the WordPress default block to add custom style options, this is a situation and the custom block program, do not have to develop a new block, you can achieve the block style of the Personalization.